
Let’s get right to where we left off last time because, much to my chagrin, there were no job offers from the Chicago Tribune or Chicago Sun-Times for a wannabe hockey writer. So, let’s revisit the iniquities of poor control wiring and what to do about it.
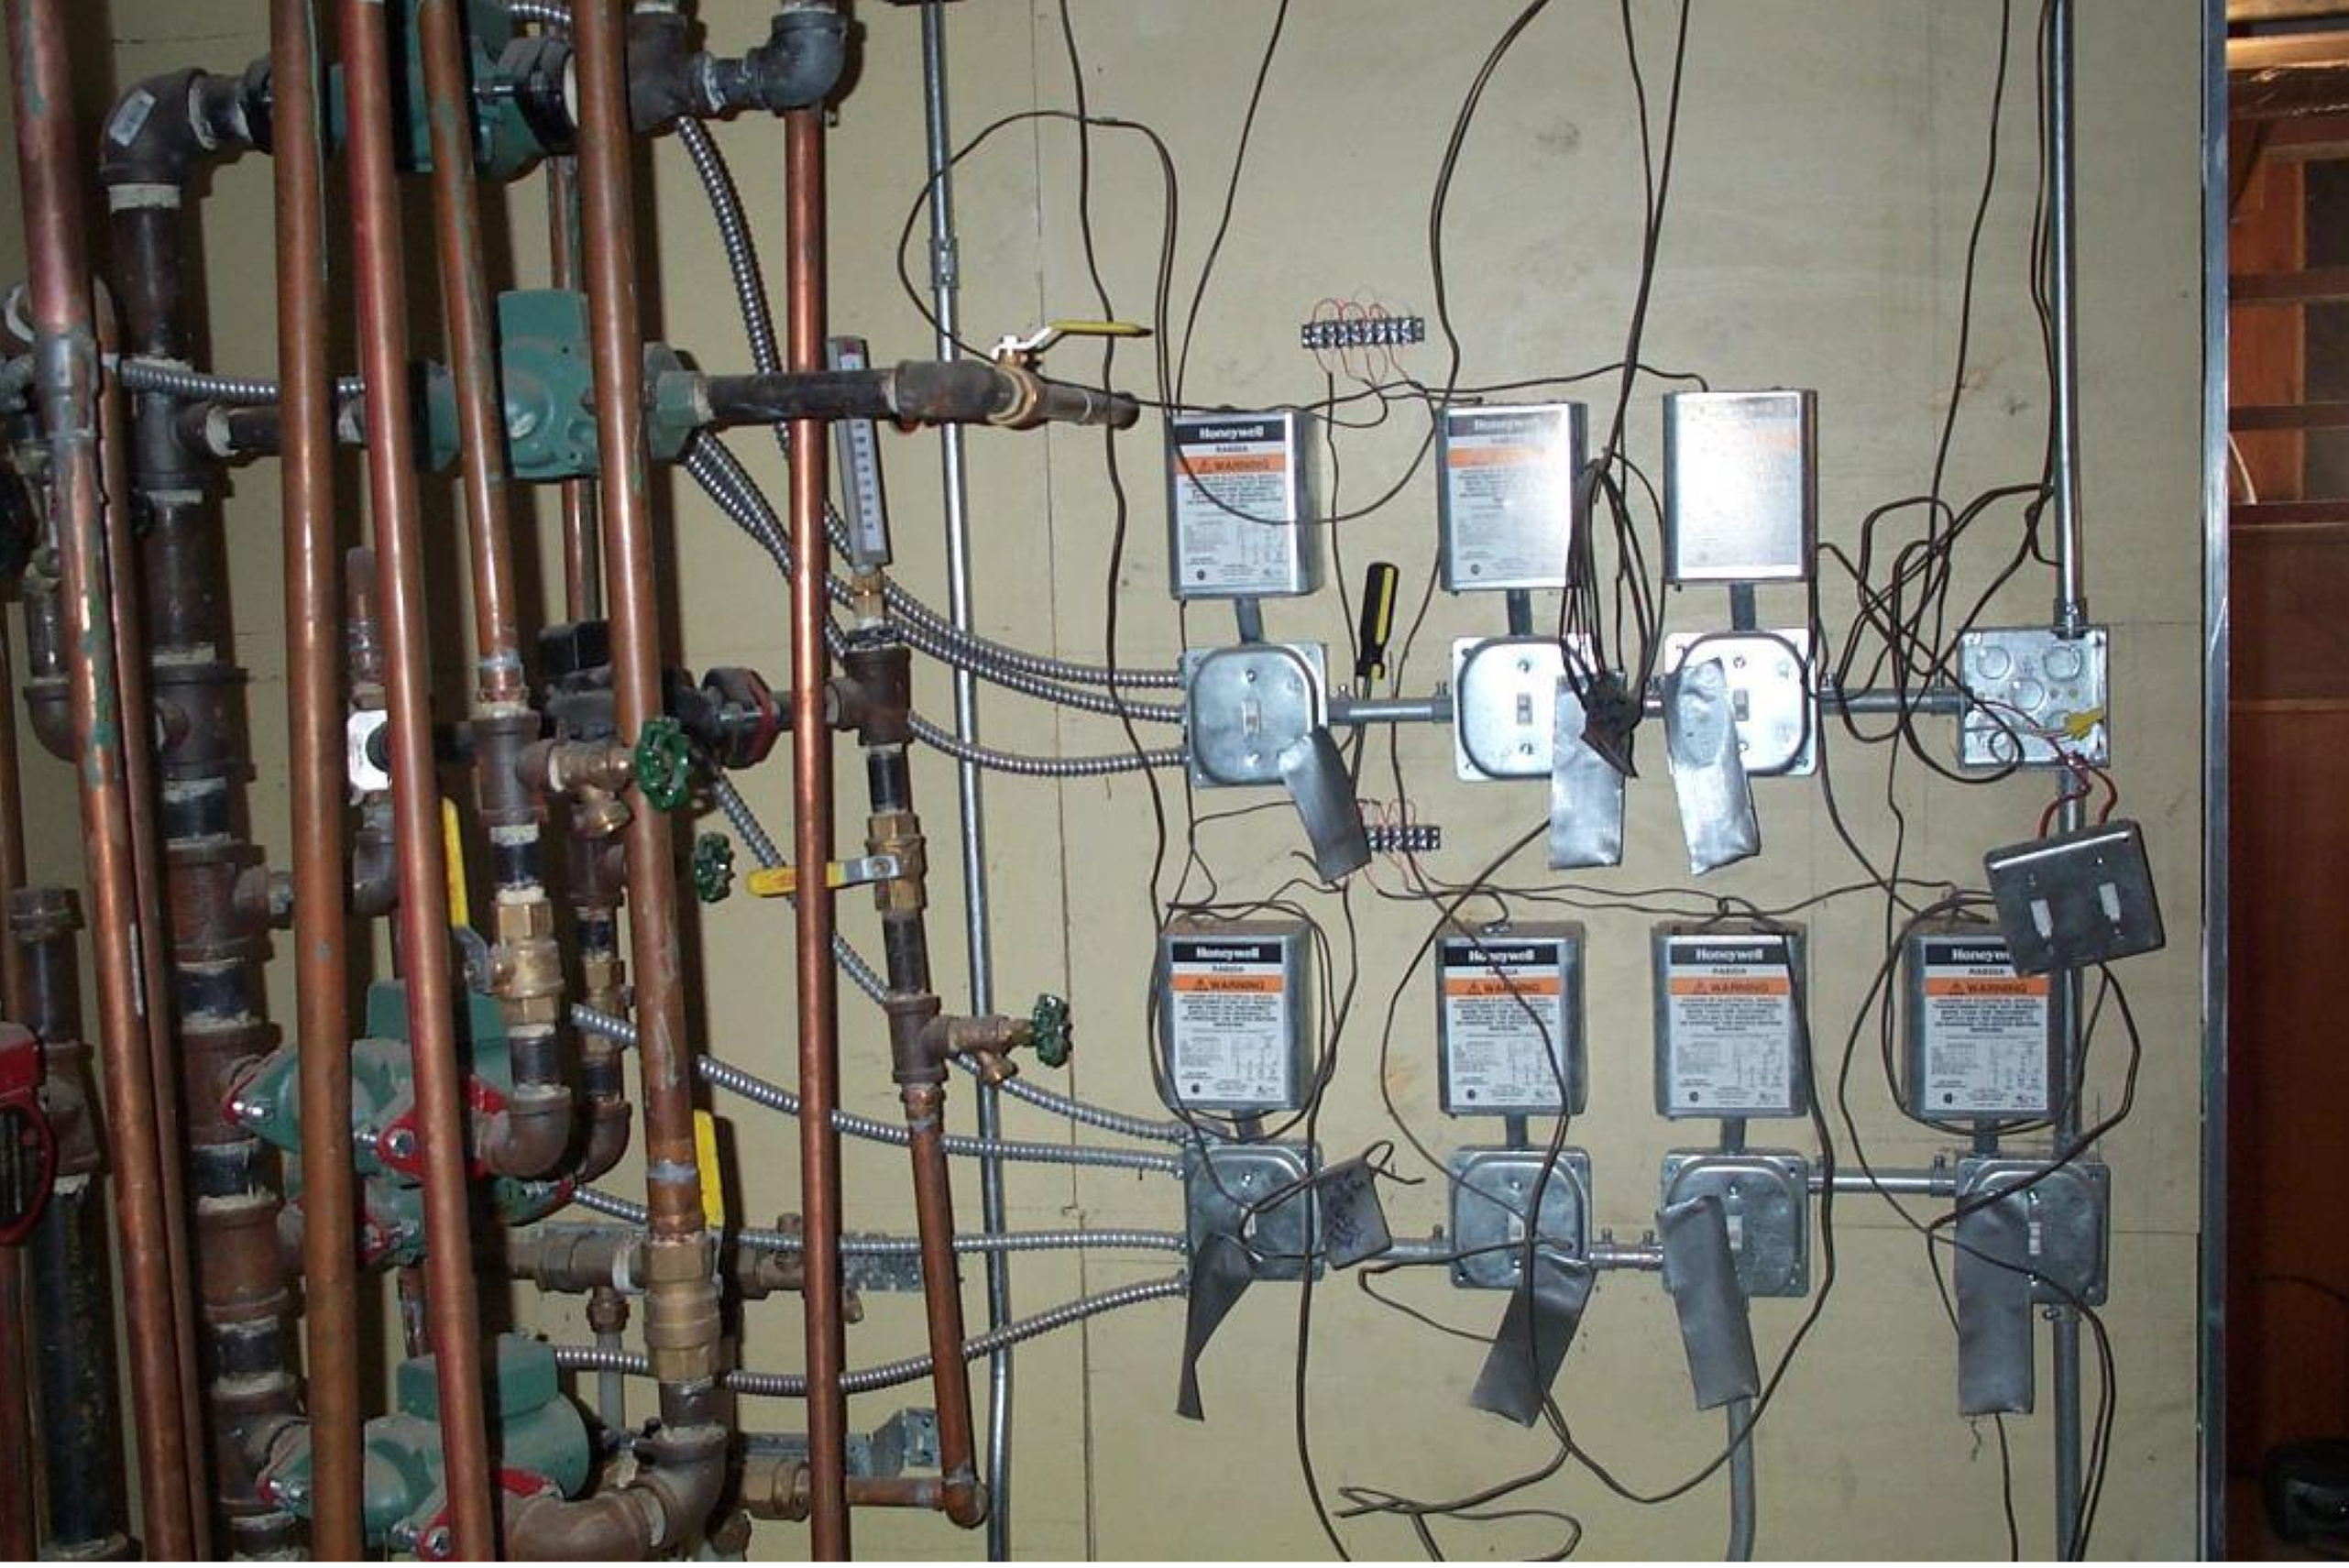
Ten years ago, I walked into the mechanical room in the Beverly neighborhood of Chicago (see Image 1). It wasn’t just any mechanical room, though. It was the mechanical room in the home of a Chicago Police Department captain. You don’t get to be a police captain by accepting mediocrity or, in this case, epic failure. And I’m not sure I’ve seen anything worse than what you see here. It’s unsafe, sloppy, unprofessional and, regarding effort and execution, about as bad as it gets. It ought to be illegal.
This was not a work in progress. It was a job some installer deemed complete. It had been this way for about eight years when I laid eyes on it. The piping may be even worse but that’s another story, for another day, in another edition. We’re focusing on wiring today.
I have no issue with the multiple pump relays used or the disconnect switches for each pump. It was installed long before four, five and six-pump relays were commonplace. The use of independent switches was a good idea. What makes me cover my eyes in horror are the duct tape labeling, dangling switches, the spaghetti mess of low voltage wiring, lack of tie straps, no plan, little skill and minimal effort.
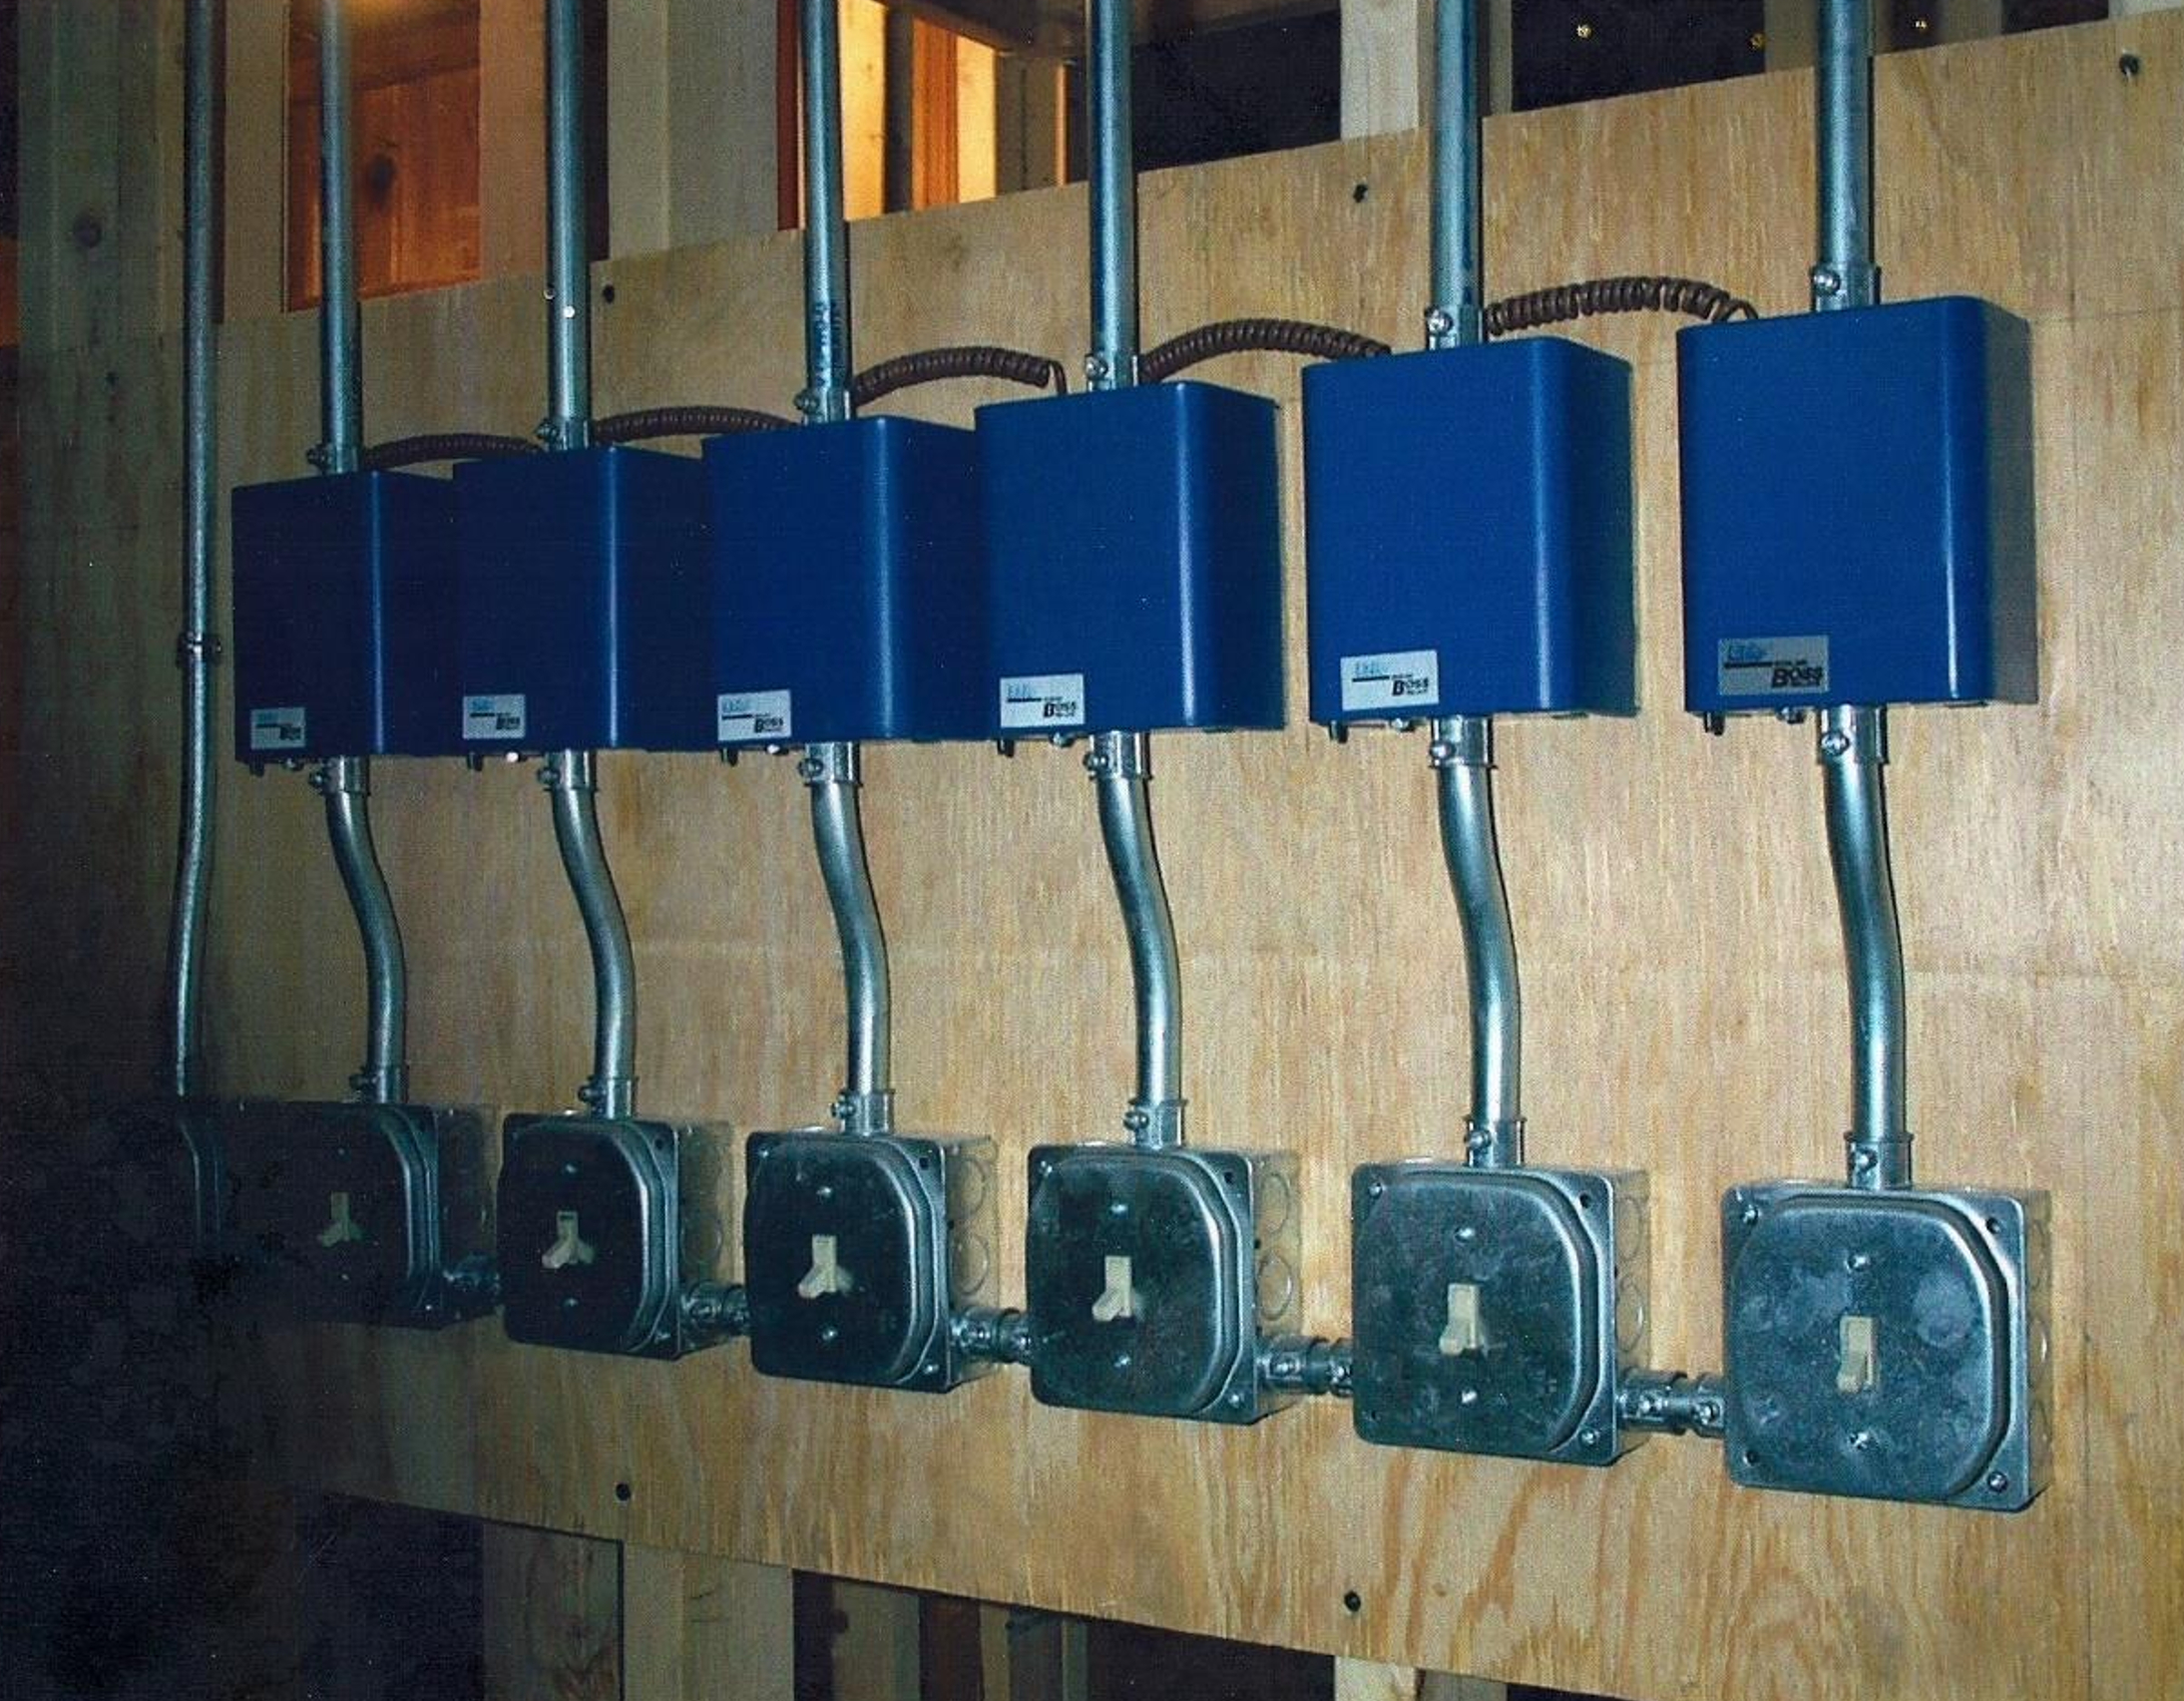
It does not have to be like this. Ever. Image 2 is a wiring job I did, in the same era, using similar components. For me, it’s easier to do it the right way. The 1900 boxes are level and on the same plane, the pump relays are level and on the same plane, and there are six identical electric metallic tubing (EMT) offsets going from the switches to the pump relays. Once you make one, the other five are a breeze. The spacing between the boxes is all the same.
The knockouts are kept consistent to make it look as if you planned it that way because you did. A plan is where every successful job begins. The low voltage wire is either hidden or “telephone corded” to add another professional touch to it. Telephone cording is easy — wrap an 18-2 or 18-4 low voltage wire, tight and condensed, around the shaft of a long, Phillips screwdriver. Once you’ve got enough wrapped to cover your run from Point A to Point B, slide it off the screwdriver. A flat blade screwdriver won’t let you do that.
The reason I used older controls for this example is to show you that even with multiple controls and boxes, you can make it look clean with a bit of forethought and some practice.
The use of stake-on connectors, raceways, EMT, a torpedo level, a wiring schematic, professional labeling, conduit box offsets, anti-short bushings, 6-foot maximum lengths of Greenfield, wire strippers, linesman pliers, telephone cording, tie straps and the right clamps will improve the wiring on any boiler, furnace or air conditioner job put before you.
Best practices
The electric is typically one of the last things you do on an installation, but you can’t treat it like a political conversation over Thanksgiving dinner. The wiring can’t be avoided. It must be done and if you’re going to do it, you may as well do it right. Right? Makes sense to me. My dad, a great guy by the way, used to say to me, “If you don’t have time to do it right the first time, when are you going to find the time to do it a second time? Because that’s exactly what you’re going to do now.” Ouch.
I spent many decades in the trenches, so I get it. You’re on your third, sweat-soaked T-shirt and that same sweat is burning your eyes. The air you’re breathing is like inhaling dried oatmeal. Your boss is pushing you to finish the boiler install because he wants you to do a service call on your way home. We’ve all been there. It’s as familiar as your favorite pipe wrench.
This is the point where we need to “ignore the noise and do your job.” I borrowed that little saying from a very successful NFL coach; I have it on a Post-It note stuck to my computer at work.
We live and work in the age of social media where Walls of Shame are appearing everywhere. You don’t want to be part of that motley crew and there’s no reason you ever should. I’m going to do my best to help you avoid that.
The first thing to do is get organized. If you’re not running back and forth to the truck every 10 minutes, you’re going to make things much easier on yourself. You’ll have more time to work with and you’ll feel confident you have everything you need to get the job done promptly. I don’t even start the electric until all the gas piping is done, leak checked and all the gear is back on the truck. In addition to the Milwaukee boxes, I bring down my electrical tools, wire, conduit and Greenfield. It’s like starting a new job.
Make sure you use the right tools for the task at hand. I like to use a portable bandsaw to cut both the conduit and the Greenfield (armored flexible conduit). It’s lightning quick, easy and makes square cuts. My arms are big enough; I have no desire to use a hacksaw anymore.
If you’re using linesman pliers or needle nose pliers to strip wires, stop. You may be stripping more than the wire insulation. Gauged wire strippers are easier to use and you’ll only cut what you want to cut.
You should always have a marker, pencil, tape measure and torpedo level on your belt. A pocket flashlight and a noncontact voltage detector are staples for me as well. Before commissioning the equipment, you’ll need to break out the multimeter to confirm voltages beyond what the noncontact detector is capable of.
Bending conduit
If you can pipefit a boiler, chances are you can bend conduit with the best of them. I can usually get in and out of most boiler rooms by knowing how to execute just a couple of bends. The most common bends are the box offset and the 90-degree stub. Everything I refer to will be using 1/2-inch EMT since it’s the pipe and size most often used in boiler room applications.
Let’s start with the box offset. This is the pipe that’s going in to, or out of, an electrical box. The box knockout for the pipe is raised 3/8 inches above the mounting surface, so we need to bend the pipe to accommodate this offset. For the longest time, I just eyeballed these bends and they looked OK. Then I learned how simple it was to do it by the book and I never looked back. Exactness is not a bad thing.
The most common electrical box I’ve used is referred to as a 1900 box — 4 inches wide x 4 inches high x 1 ½ inches deep. It’s a strange name, isn’t it? Being the curious type, I looked it up once and found that the original electrical box this size was a Model 1900, so the name just stuck. Go figure.
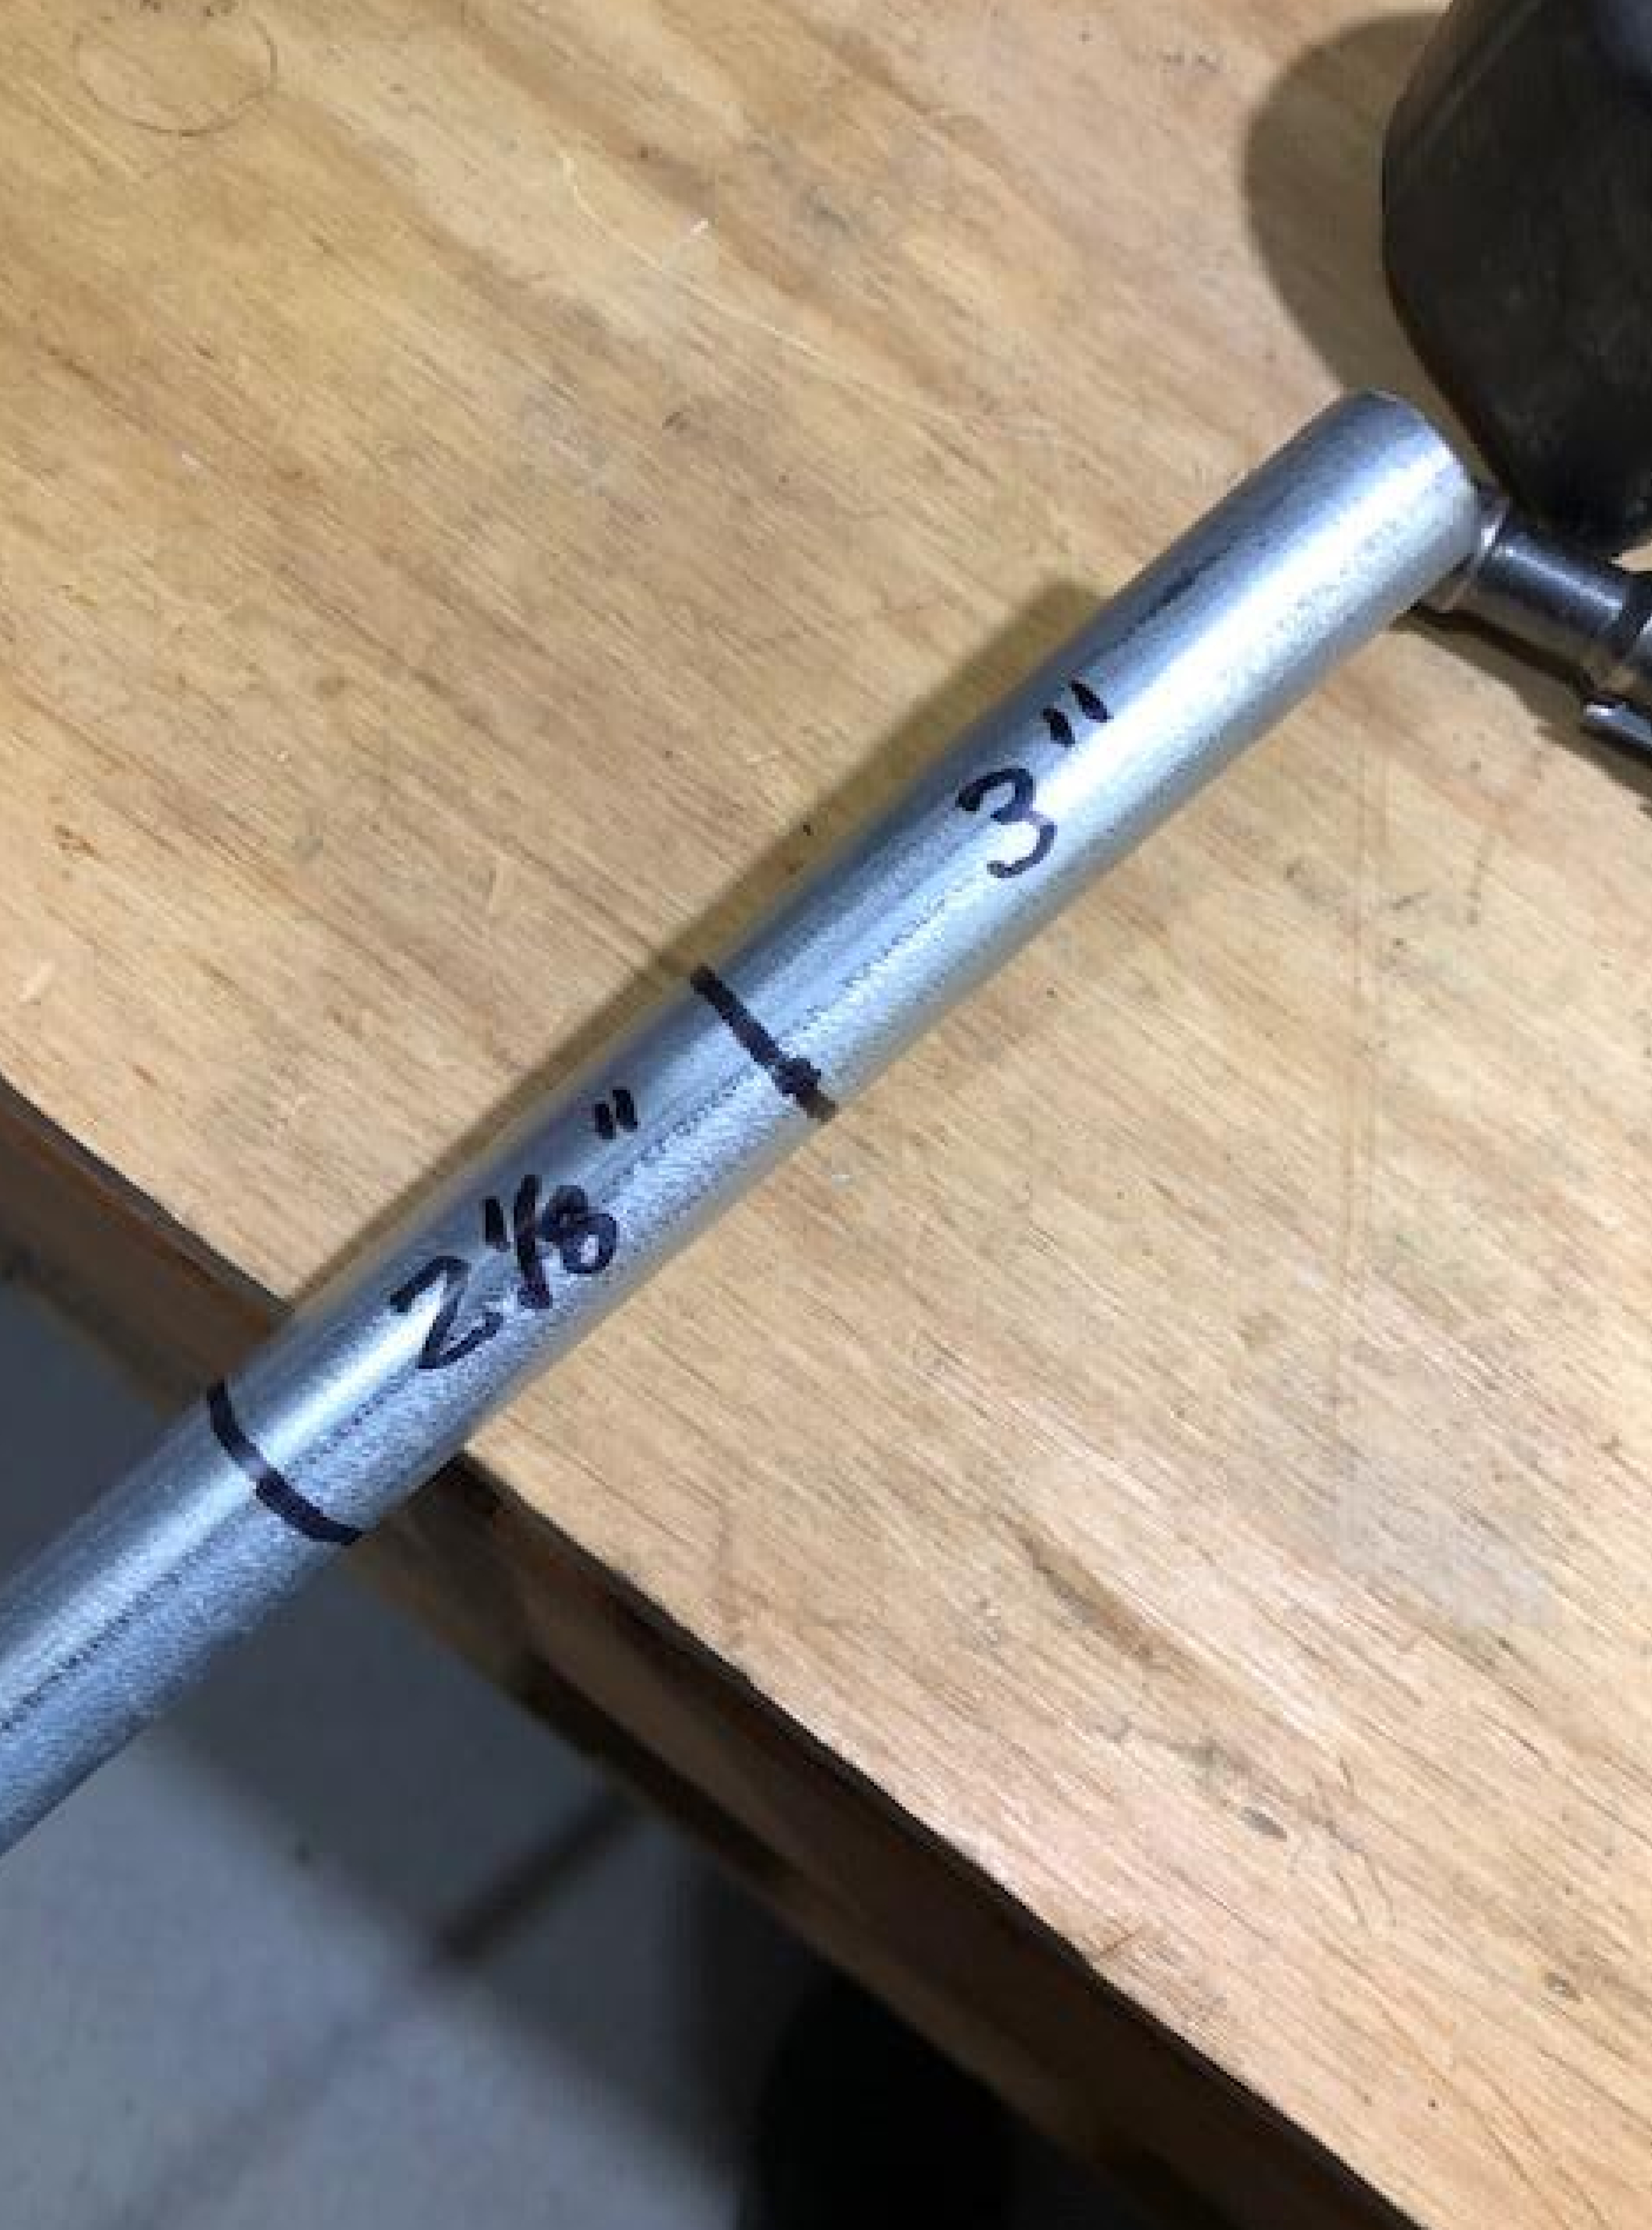
There are only a few things you need to remember when bending a box offset — 3 inches, 2 1/8 inches and 10 degrees. That’s it. If you remember those three things, you’re golden. On a straight piece of ½-inch conduit, mark a point 3 inches from the end of the pipe with a marker. This will be the spot for your first bend and gives us just enough meat to get our bender on it. Wrap the mark all the way around the pipe because you’ll need to see it from different angles.
From that mark, measure and mark a second spot at 2 1/8 inches and wrap it all the way around the pipe. This point represents the offset. When completed, the pipe will look similar to Image 3.
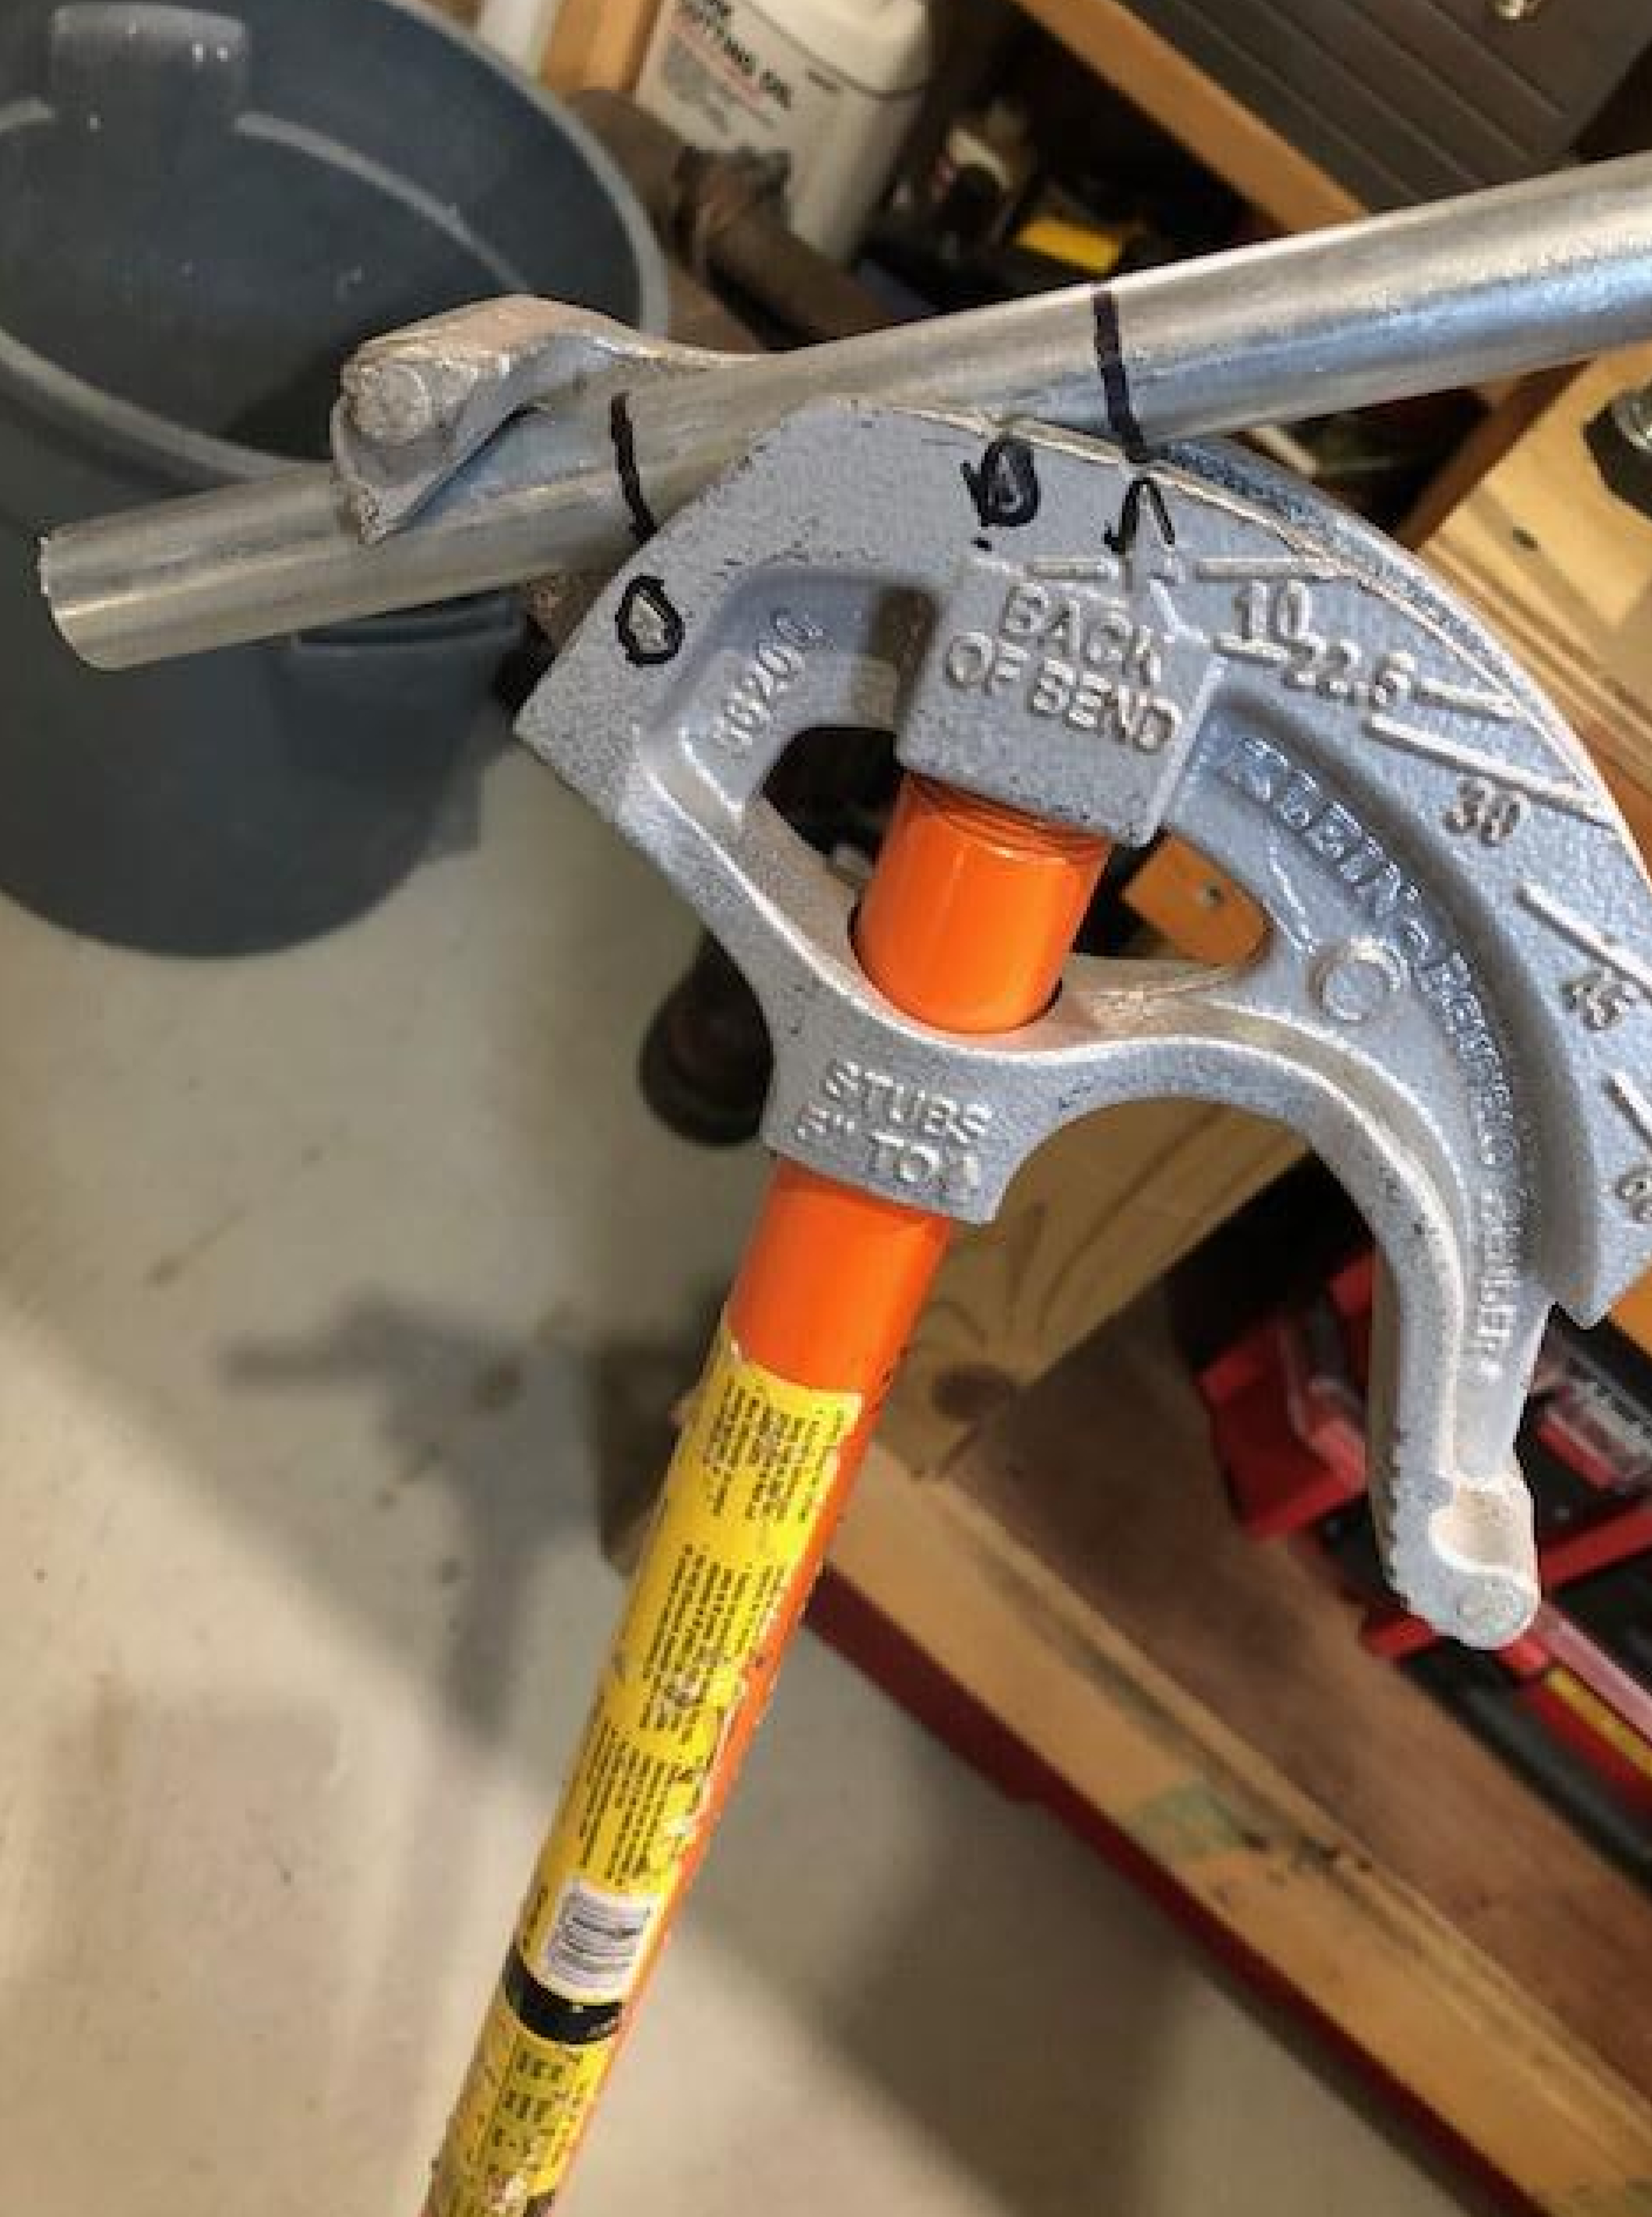
Next is where the 10 degrees comes into play. Three specific symbols appear on your conduit bender — a teardrop (or notch), a star and an arrow. For the box offset, we’re only going to use the arrow. With the handle end of your bender resting on the floor, place the pipe into the bender hook with the first mark at 3 inches lined up with the arrow. It’s just a coincidence that the second mark lines up with the star. Don’t let it confuse you. I’m right handed so I have my right hand on the pipe. My left hand is on the bender and my left foot is holding the handle of the bender in place at the floor level (see Image 4).
At the right of the star, you’ll see designated degrees of bends — 10, 22.5, 30, 45 and 90 degrees. Push down with your right hand until the pipe is parallel with the 10-degree line. The first bend is now complete. Now flip the pipe over and line the second mark up with the arrow. Make certain your pipe is straight in the bender, otherwise your two bends will be on different planes. Push down again until you’re, once again, parallel with the 10-degree mark. Your offset is now complete.
Next up is the 90-degree stub. This smooth move will get you from a horizontal or vertical run of pipe 90 degrees into a box or fitting without even the thought of guessing. It’ll all be simple math and execution and it will look as if you subcontracted Sparky’s Inc. to do it for you.
Let’s say you have the top of a box mounted 48 inches above the finished floor. You want to come out of the top of that box with 1/2-inch conduit and bend it 90 degrees so it’s running horizontal 64 inches above the finished floor. Some things you need to know:
- The arrow symbol also is used for 90-degree stubs.
- Half-inch EMT has a take-up of 5 inches when bending the pipe to 90 degrees.
- The difference between the top of our 1900 box and our horizontal run of pipe is 64 inches – 48 inches = 18 inches.
- Work with your pipe and bender at the floor, using your foot to execute the bend rather than your hand.
- Keep the 5-inch take-up in mind and mark the pipe, from its end, at 13 inches to get the required 18-inch bend.
- Insert the pipe into the hook of the bender on the floor, align the 13-inch mark with the arrow, and exert pressure on the heal of the bender with your foot until the pipe is bent to 90 degrees.
- The internet is full of information and videos of how to bend conduit. Many of us are visual learners so don’t discount visiting YouTube for instructional videos. You can find free calculator apps for bending pipe that will provide you with the take-ups, deductions and suggested angles for different bends. At times, you may see some numbers slightly different than mine, such as a 1/16 of an inch or so. Don’t sweat it too much.
Rules I follow for flexible metallic conduit (Greenfield):
- I prefer to keep my whips to 4 feet or less but most jurisdictions will allow up to 6 feet.
- I cut it with a portable bandsaw — lightning fast, clean and square.
- Always use the red anti-short bushings. I use the ones with the tails; they make it easier for the inspector to find them.
- Don’t skimp on the one-hole straps keeping the bend uniform, secure and professional-looking.
- From your pump relays to your pumps, don’t be afraid to use most of the run with 1/2-inch EMT and then a 3/8-inch whip using the appropriate fittings.
- Note the difference between Greenfield and BX. Greenfield does not come with wire in it and is on very short lengths; you can pull additional wire through it. BX comes with wire in it, you can’t pull through it, and most places where I’ve worked, it’s against code. I never use BX.
- Use a ground wire on loads that require one. Always.
- When it makes sense, consider a wire trough.
Rules I follow for low-voltage wiring:
- Whenever you can, hide it. Tie strap on the backside of conduit or gas pipe. The less you see, the better.
- Consider the use of low-voltage terminal strips within equipment panels, near the controls, instead of wire nuts. This method makes troubleshooting easier and portrays a professional look.
- I telephone-cord just about every length that is not tie-strapped to a pipe unless it is 4 inches or less.
- Before you disconnect any low-voltage wiring on equipment, label it so it’s easily identified when it needs to be reconnected. Don’t rely on color codes alone.
- If you’re going through a knockout with it, make sure you use a grommet to avoid future shorts.
Labeling
If you’re using a Sharpie, please stop.
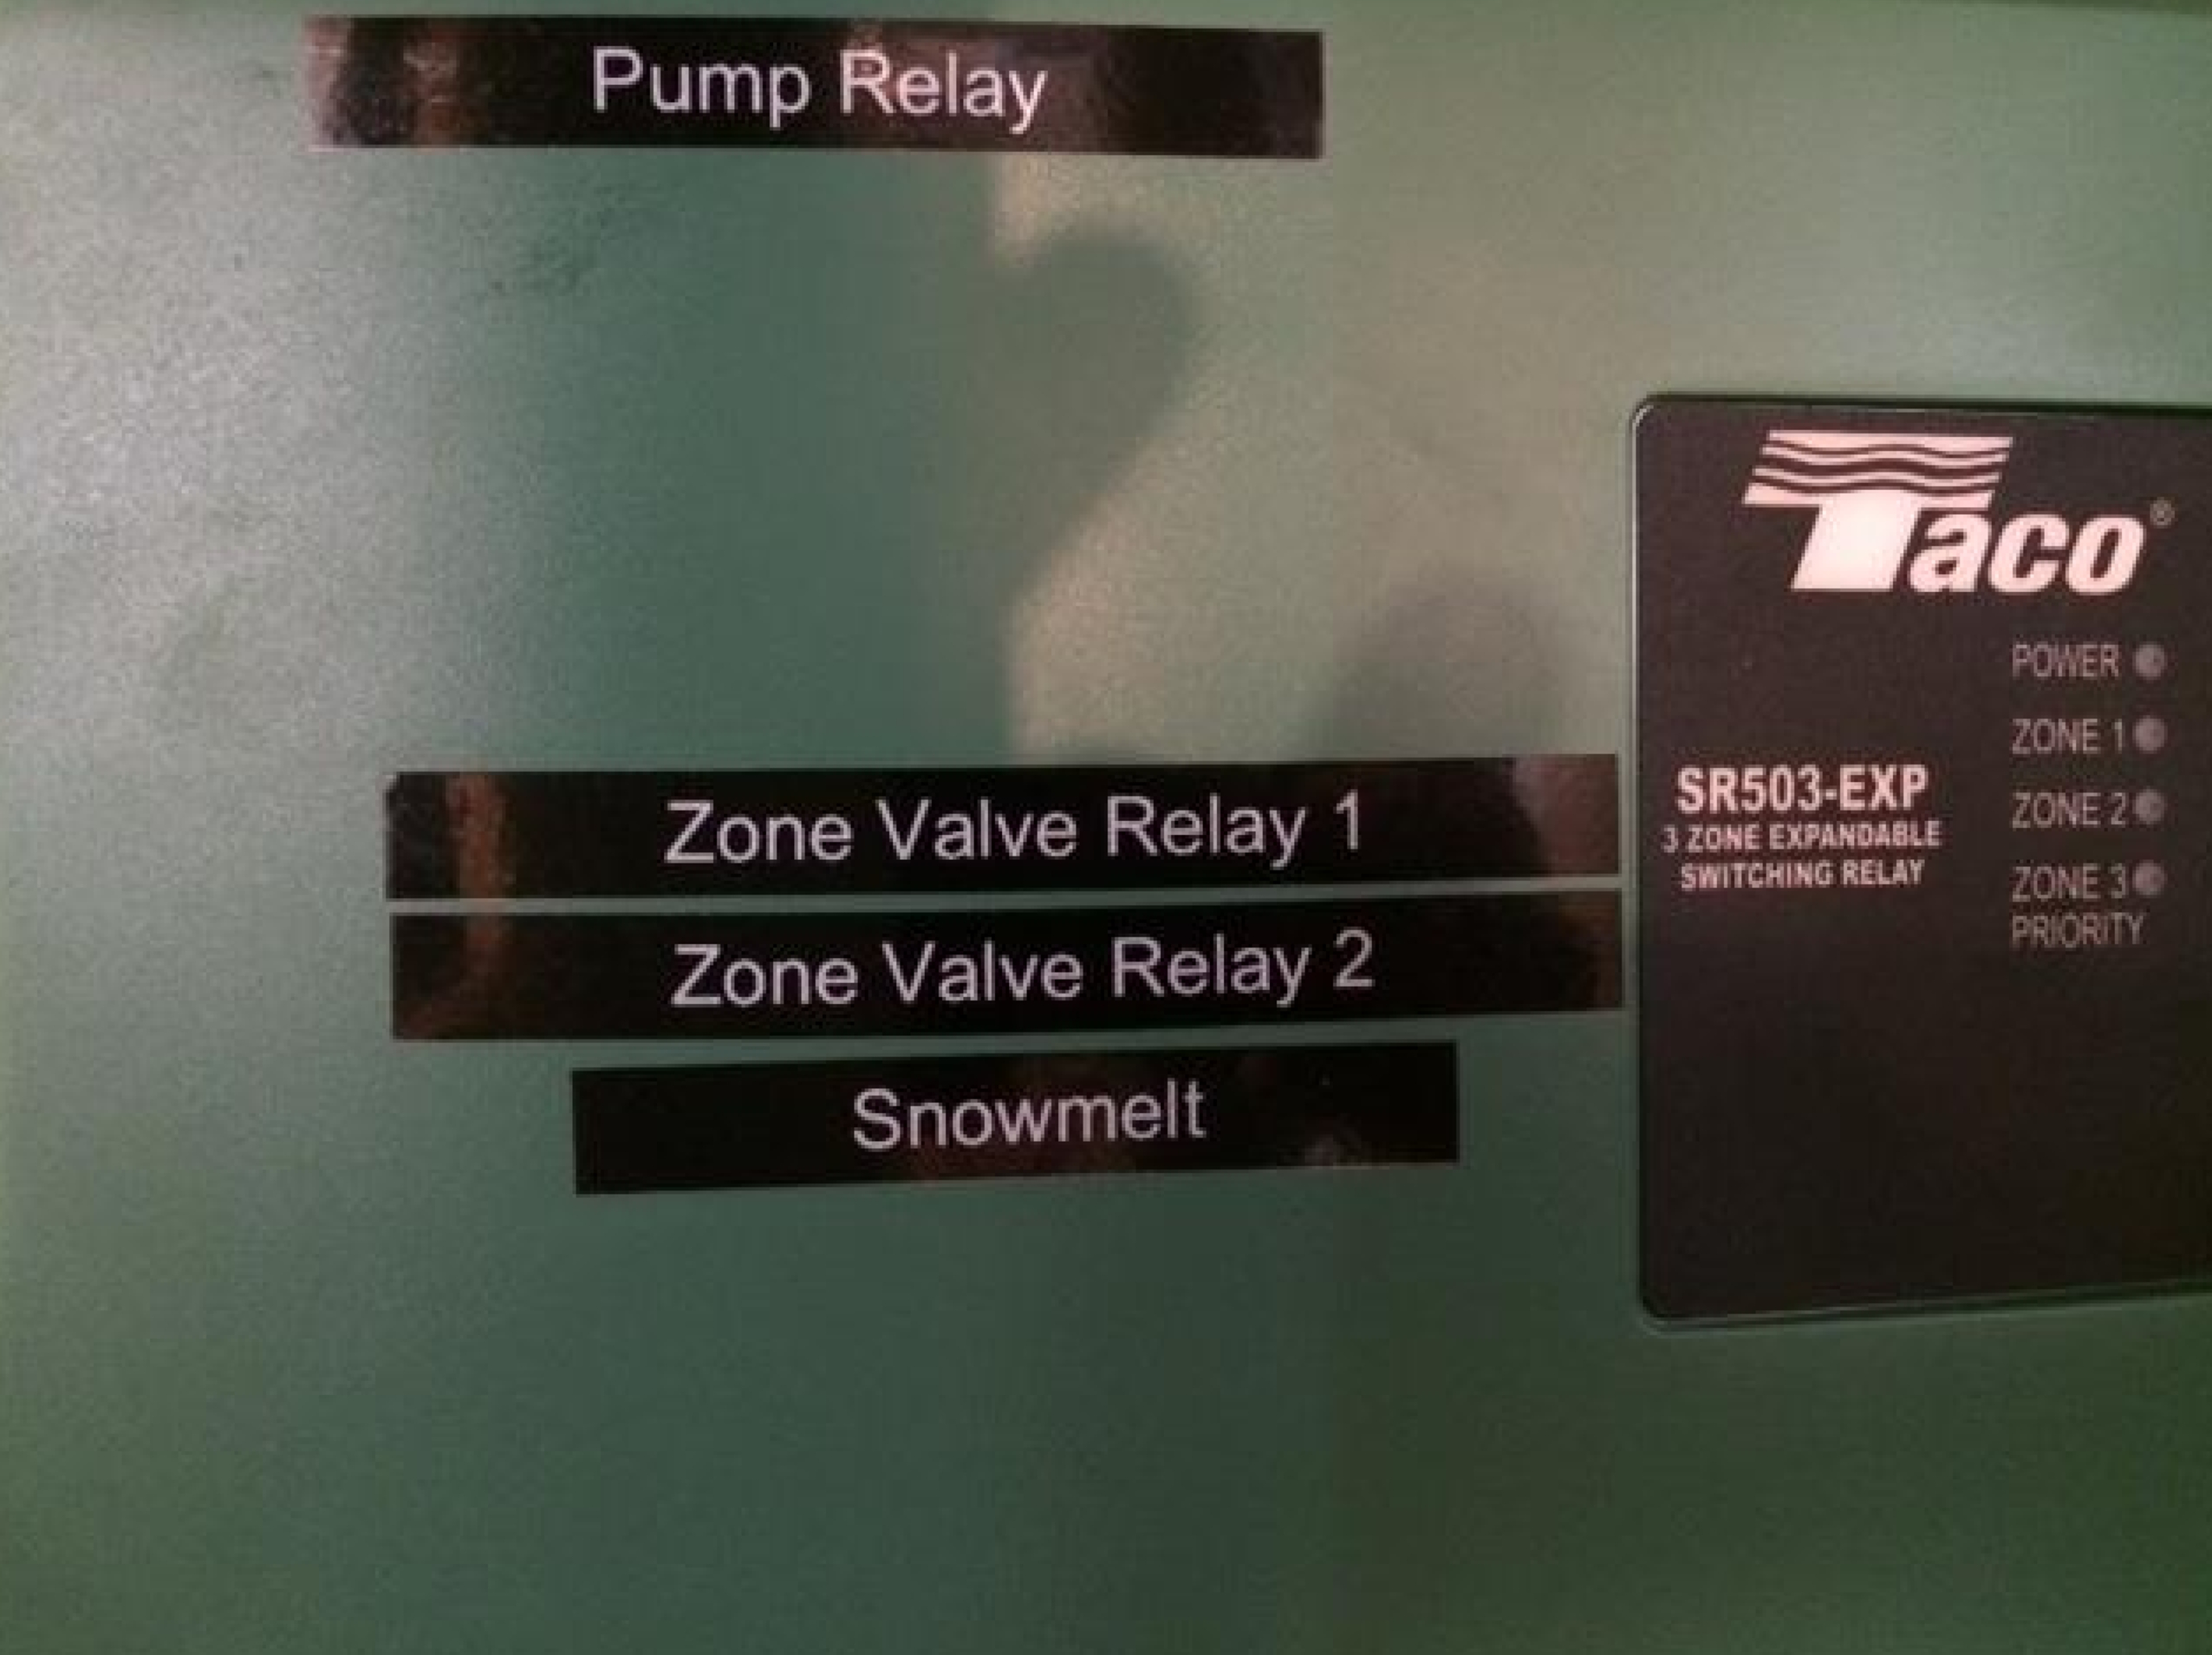
I use a Brother P-Touch Labeler. I’m sure it’s outdated, but my point is that you’ve got to use one if you want to make a favorable impression with your customers (see Image 5). It also helps everyone involved to connect the dots regarding what’s going on.
I label the boilers Boiler 1, Boiler 2 and so on. I label pump relays, zone valve relays, pumps, zone valves, transformers, low water cut-offs, acid neutralizer kits, flow switches, mixing valves, exhaust pipe (if it’s Class IV), intake pipe, snow-melt controls, etc.
Once you start labeling, you can’t stop. It becomes a sickness that may, at some point, require intervention.
If you have any control wiring outside the boiler cabinet that does not come as part of the boiler itself, please leave behind a wiring schematic along with a sequence of operation. This an absolute necessity so the next poor soul who comes along isn’t required to do any hydronic calculus to understand what your intent was.


