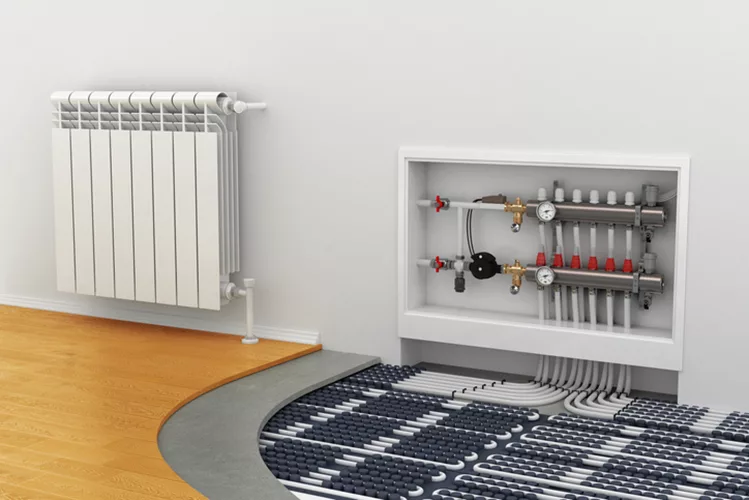
When designing, installing or servicing closed hydronic heating systems, pressure is often overlooked and even forgotten. It can make or break your system in a variety of ways; some are easily understood, while others may take a bit to sink in. First, we must consider the system’s needs. You’ve got a design, and it’s possible that you’ve already installed your piping. You have a typical fill valve connecting your potable water to your system (Figure 1). It’s what allows you to fill your system with water, and it comes from the factory set at 12 psi. Whether it is the correct and necessary pressure for your system is up to you.
Your cold fill pressure depends on system height and from where you’ll be filling and reading pressure. It is often assumed (in residential boiler applications) that your heat source and fill point will be at the lowest point. This is not always the case, but let’s assume that for now.

In a two-story house with baseboard convectors and a boiler in the basement, you typically see a system height of 16 feet. If you were to open a fitting at the top and fill the system with water, you could go down to the basement and read roughly 7 psi at the boiler. This is due to the weight of the water in the system. For every foot of height in a system filled with water, you’ll see 0.43 psi at the bottom.
Now, let’s think about filling the system from the basement, as we normally do. You could infer that it would take 7 psi at the bottom of the system to get water all the way to the top, and you would be correct. Where you’ll run into trouble in this scenario is if you think you’re going to see 7 psi at every point in the system. If you were to put a gauge on the first floor at the baseboard, you’ll read 3.5 psi. When you put the gauge on the top of the system, I can assure you it’s not broken; it really is 0 psi.
When you hear 12 psi is the magic number, it’s based on that same two-story house. The extra 5 psi at the bottom guarantees 5 psi at the top instead of 0 psi. That positive pressure at the top will work in your favor, allowing you to push out air from your bleeders or air vents at the top of the system. It will also raise the boiling point of the water in your system and help to keep air entrained so it can make its way back to your air separator.
Even better, it will ensure that you’re not pulling air back into your system. This is a wild concept, but there are circumstances where even though the system is filled with water, it can be under negative pressure. For example, when your circulator turns on. The circulator’s job is to induce flow; when it adds energy to the water, you will see a change in pressure from the inlet to the outlet of the circulator. Because of this change in pressure, what was once 0 psi at the top of the system could very well drop below 0 psi.
Second, you need to determine how you pull air into a sealed system. The answer is automatic air vents (Figure 2). While they do wonders removing air from systems, they’re also quite awesome at letting air in! This could be to your advantage when draining a system but a complete surprise when you’re not expecting it.
This air can cause corrosion in your system due to oxidization. It can also cause noise in what should be a magically quiet heating system. Even worse, it will potentially airlock the heat emitters at the highest points of your system, resulting in no heat at all.
We also need to remember that even if our boiler fill valve and pressure gauge aren’t at the lowest point, it doesn’t mean you can automatically fill at a lower pressure. Many boilers out there are equipped with sensors requiring a specific pressure to operate; it may even be higher than 12 psi.

Know what your system requires
Now that we know 12 psi is the magic number for a two-story home, what is the magic number for a three-story home? If we’re adding another 8 feet and still want that positive pressure at the top, assume you’re going to 0.43 psi per foot. This would add another 3.5 psi, making 15.5 psi your desired fill pressure as long as you’re filling and reading at the bottom of the system.
The next place you’re going to find a problem is thinking you can keep adding psi as the building gets taller. I took a call from a contractor several years ago. He was having issues with what he thought was a failed boiler fill valve. He had a five-story building with a total system height of 45 feet and boilers at the bottom. This required at least 20 psi to get water to the top, plus an additional 5 psi to ensure positive pressure at the top.
His problem was that he was setting the fill valve to 25 psi, but his system pressure was creeping ever so slightly up — just enough to allow the pressure relief valves on the boilers to start dripping. The installed boilers were using 30 psi relief valves; why were they dripping at 27 psi?
Is it plausible that the boiler fill valve was overshooting? Maybe. Could it be an erroneous gauge? Yes, it’s possible. Could it be that pressure relief valves don’t hold 100% tight until exactly 30 psi? Definitely. What about the expansion tank being undersized or failing? All likely.
Regardless, the system was designed to walk a tightrope, with the design fill pressure so close to the 30 psi relief valves. This would’ve been a great time to design the system with the boilers anywhere, but not at the bottom. If the bottom of the system was the only option, maybe separating them with a heat exchanger or using commercial boilers rated for higher pressure would’ve been a better choice.
Filling your heating system isn’t only about turning the water on and hoping that 12 psi will cut it. Knowing what your system requires is essential. Understanding what can happen when not set properly comes with experience.